Vases: Learning to TIG
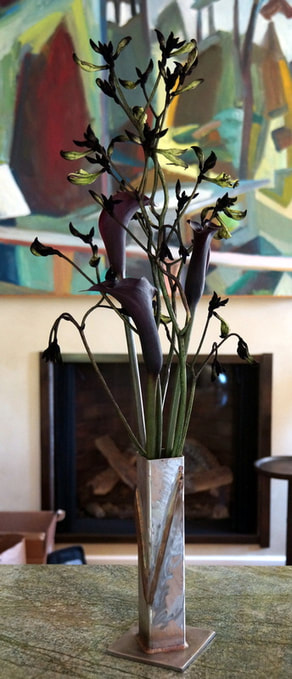
Copper vase in action.
My parents are amazing people -- the summer after freshman year of high school, they granted me control over the garage and purchased my dream tool: a Lincoln Precision TIG 225. I had recently taken a couple of welding classes at the Crucible (MIG and TIG) with a friend of mine from middle school and loved every minute of it (unlike middle school). Although the MIG was certainly an easier tool to use, I enjoyed the precision of the TIG and the versatility that it afforded: because the electrode is non-consumable, all you need to do when welding different metals is to change the filler rod that you use (and sometimes the waveform of current applied through the torch tip).
I won't lie -- my first welds stank. But I was thrilled that within a couple of months I had risen to the top of my class at the crucible; my welds were serving as "gold star" examples for other students to follow! At some point during my countless hours of T-joint welding practice, I realized that I had inadvertently created a simple square-tubed vase. After graining the sides with an angle grinder (but leaving the rainbow of weld beads untouched) I brought it back to my proud mom.
I won't lie -- my first welds stank. But I was thrilled that within a couple of months I had risen to the top of my class at the crucible; my welds were serving as "gold star" examples for other students to follow! At some point during my countless hours of T-joint welding practice, I realized that I had inadvertently created a simple square-tubed vase. After graining the sides with an angle grinder (but leaving the rainbow of weld beads untouched) I brought it back to my proud mom.
the process
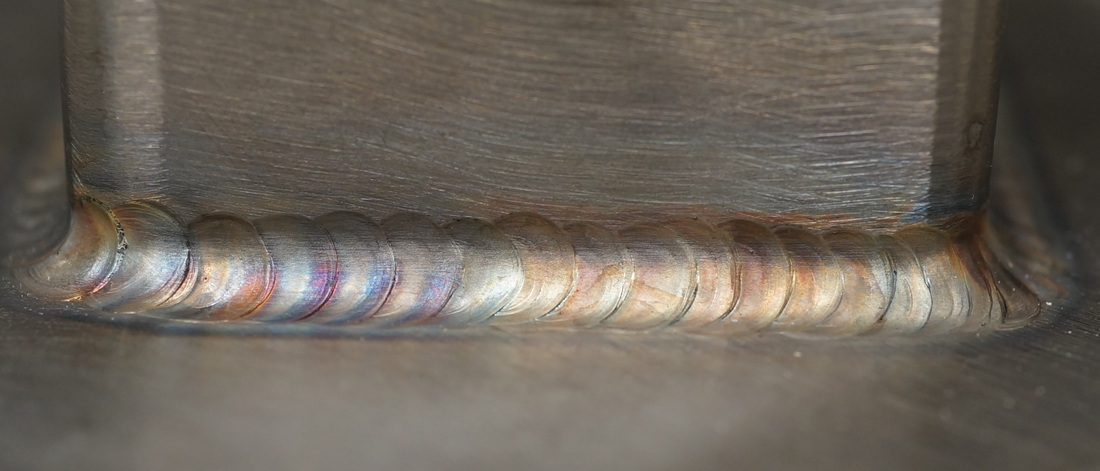
Weld beads.
|
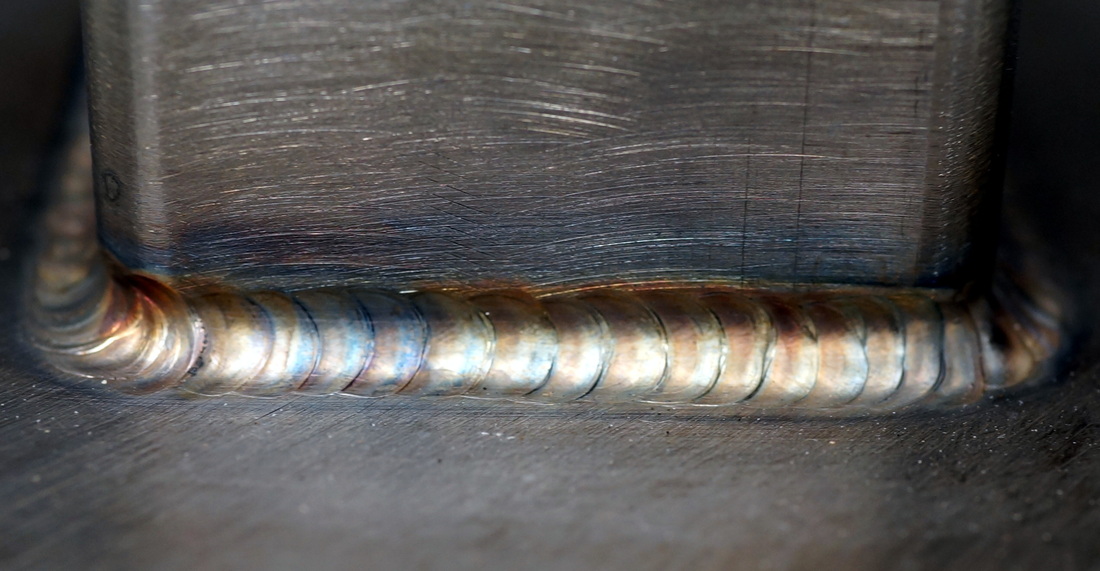
More weld beads.
|
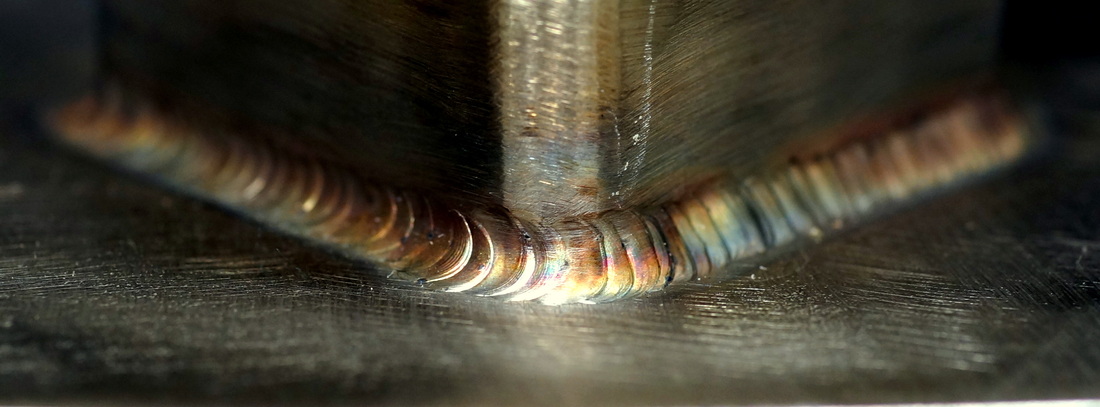
Even more weld beads!
|
I made a couple more of the simple vases for family and friends, and then began to experiment. I really enjoyed the way that the stainless steel changed colors after being heated, and wondered if including other metals would make the heat-affected-zone even more magical. Using a bronze filler rod and plenty of amperage, I fused a thick bar of copper to one side of a vase at an angle. On the adjacent face, I built up a ridge of bronze beads using the filler rod and my TIG torch. Once it all cooled down, I sanded all surfaces with an angle grinder to get everything shiny and textured. Finally, I used the TIG torch to gently heat one end of the copper bar, allowing the heat to conduct up its length and create a full spectrum of colors. The copper has since oxidized a bit (the colors are no longer as brilliant as they once were) but I still like it just as much.
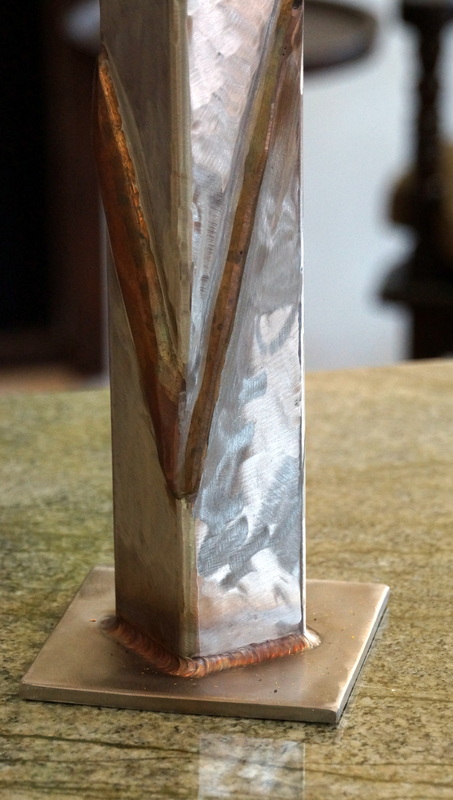
Close up.
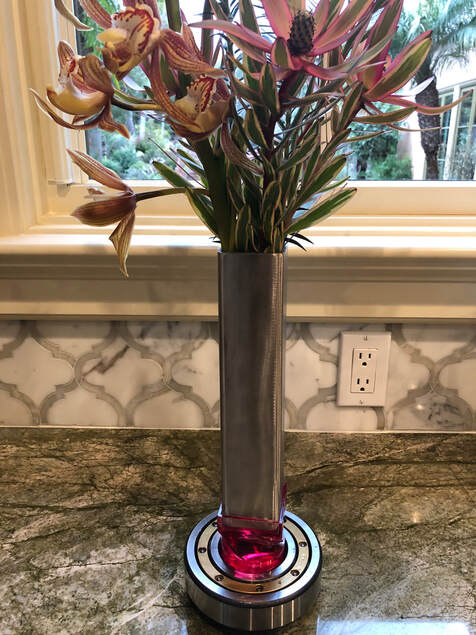
Vases: Learning to Cast?
The vase below is a more recent project, inspired by an old ball-bearing I found (it still spins, but is very loose). I also wanted to challenge myself to product the clearest casting possible. I bought some epoxy resin (EpoxaCast 690), and a bit of red tint. I printed and sanded/smoothed/buffed the master, then made a silicone negative of that. When it came time to pour the epoxy into the silicone mold, I first mixed it, degassed it, then carefully poured it in (so as not to introduce any air bubbles). Then I put the filled mold into a high-pressure chamber, and charged it with 60psi air (BE VERY CAREFUL IF YOU TRY THIS -- PRESSURE CHAMBERS CAN BE DANGEROUS). The casting that came out was perfectly bubble-free, as you can see!